How to Use a Grinder
A grinder is a versatile tool for sharpening, cutting, polishing, or shaping materials like metal, wood, and food. Follow these key steps for safe operation:
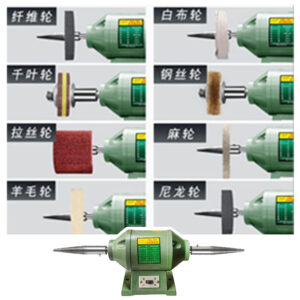
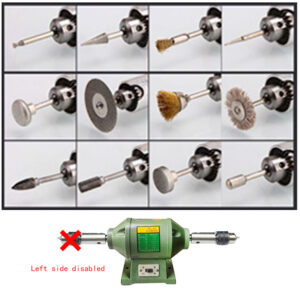
1. Select the Right Grinder & Accessories
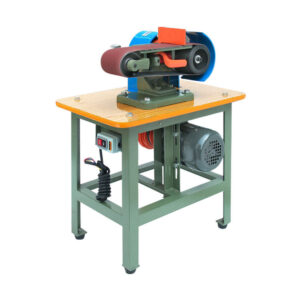
- Bench Grinder (砂轮机) – For sharpening tools (drill bits, chisels, knives).
- Angle Grinder (角磨机) – For cutting metal/stone, grinding welds.
- Wheel/Disc Choice:
- Aluminum oxide wheel – General-purpose grinding.
- Diamond wheel – Hard metals/tungsten.
- Wire brush – Rust removal.


2. Safety First
- Wear goggles, gloves, and a mask (sparks/dust are hazardous).
- Secure the workpiece—never hold it by hand when grinding.
- Keep the grinder unplugged when changing discs.
3. Operation Steps
- Power on: Let the grinder reach full speed before use.
- Grinding Technique:
- Apply light pressure to avoid overheating.
- Move the workpiece steadily across the wheel (don’t linger in one spot).
- Cooling: Dip metal tools in water periodically to prevent "blueing" (loss of temper).
Pro Tip: Use the grinder’s tool rest for precise angles when sharpening.
What Is a Grinder Used For?
Grinders have diverse applications across industries and DIY projects:
1. Sharpening & Tool Maintenance
- 🔪 Blades: Knives, scissors, lawnmower blades.
- 🛠️ Drill Bits & Chisels: Restore edges for cleaner cuts.
2. Metal Fabrication
- 🔥 Cutting/Welding Prep: Remove burrs, polish seams.
- 🧱 Masonry Work: Shape concrete or tile edges.
3. Food Processing
- ☕ Coffee Beans: Burr grinders for uniform grounds.
- 🌶️ Spices: Blade grinders for powders.
4. Heavy-Duty Tasks
- 🚜 Automotive: Smoothing engine parts, cutting exhaust pipes.
- ♻️ Recycling: Crushing materials like plastic or glass.
Key Takeaway: Match the grinder type (bench, angle, or handheld) to your task—precision or power.
How to Sharpen a Drill Bit on a Bench Grinder
Restore dull drill bits in minutes with a bench grinder:
Tools Needed
- Bench grinder with medium-grit wheel (~60-120 grit).
- Drill bit gauge (or protractor) for angle verification.
- Bucket of water (for cooling).
Step-by-Step Guide
Set the Grinder:
- Adjust the tool rest to 59° (standard drill bit angle).
- Mark the desired angle on the rest with chalk if needed.
Grind the First Flute (刃):
- Hold the drill bit at 59°, lightly touch the wheel.
- Rotate the bit clockwise to grind evenly—don’t overheat!
- Dip in water after 2-3 seconds of grinding.
Repeat for the Second Flute:
- Flip the bit 180° and grind the opposite edge to match the length/angle.
Check Symmetry:
- Use a gauge or compare both edges—uneven edges cause wobbling.
- Test on scrap wood/metal to verify sharpness.
Warning:
- Avoid overheating (prevents loss of temper).
- Wear gloves—the bit gets extremely hot.
Pro Fix: For tungsten/cobalt bits, use a diamond wheel and slower speed.
Before & After
| Dull Bit | Sharpened Bit |
|---|---|
| Splintered wood | Clean, fast holes |
| Requires pressure | Self-feeding cut |
Cost Savings: Sharpening extends a bit’s life 5x—vs. buying new ($2-$20 per bit).
Summary:
✅ Usage: Grinders handle cutting, sharpening, and polishing.
✅ Drill Bit Sharpening: 59° angle, light pressure, cool frequently.
✅ Safety: PPE (goggles/gloves) + secure workpiece = accident-free grinding.
Try It: A sharp drill bit cuts 50% faster with less effort! 🔧⚡